Overview: The purpose of this exhibit is to demonstrate how to create and use styles. Design Principles:
Contrast: Placed a green box behind the text so there was enough contrast that viewers could easily read what is written on the picture.
Repetition: I followed the Christmas color scheme and matched other colors in the image.
Alignment: Elements were placed to create balance and unity.
Photoshop Skills: I started by creating the red and white pattern. I did this with a transparent canvas, drawing three rectangles of different shades of red. Then, via the edit menu in Photoshop, I selected "define pattern" and saved my design there.
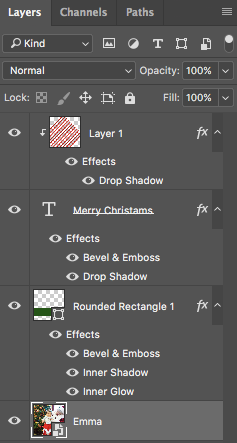
I then added a text box with the desired text, and added a new layer. Using the paint bucket tool, and "pattern" option, I placed the pattern on the text and then used a clipping mask placing the pattern inside the text. Using the transform tool, I was able to move the stripes from vertical to slanted.
From here I created two styles that added the finished touches to the text, helping it look like candy canes. To the pattern layer I added a drop shadow, creating a green line on the pattern. Selecting the "cone" option in the countour settings helped the green line to stand alone. This style was called "Candy Cane 1." To the text layer I added played with the "bevel & emboss" setting as well as the drop shadow. These two edits were applied to make the text look shiny like candy and stand away from the background. This style is called "Candy Cane 2". Both of these styles need to be applied to achieve the desired look.
I downloaded a new font for this portfolio piece, and also applied other layer styles to the green rectangle as needed. Credits: Image: Taken and used with permission from Megan Rangel Help with the Candy Cane Tutorial: https://www.youtube.com/watch?v=v72VmVmR6cw